1. Overview of XM
Before we dive into the registration process, let’s take a moment to understand what XM offers. XM is a globally recognized forex broker, highly rated for its transparency, low trading fees, and advanced technology platform. The broker allows trading on various asset classes, including forex, CFDs on indices, metals, energies, and stocks. For beginners, XM also provides demo accounts for practicing without real money.
With these advantages, XM is suitable for both beginners and experienced traders. Now, let’s move into the detailed process of creating an account on XM.
2. Step 1: Visit XM’s Homepage
To begin, open your web browser and go to XM’s official website: https://www.xm.com. The website supports multiple languages, including English, making it easy to understand and follow the registration steps.
3. Step 2: Start the Registration Process
On XM’s homepage, you’ll see a button labeled “Open a Real Account” at the top right corner of the screen. Click this button to start the account creation process.
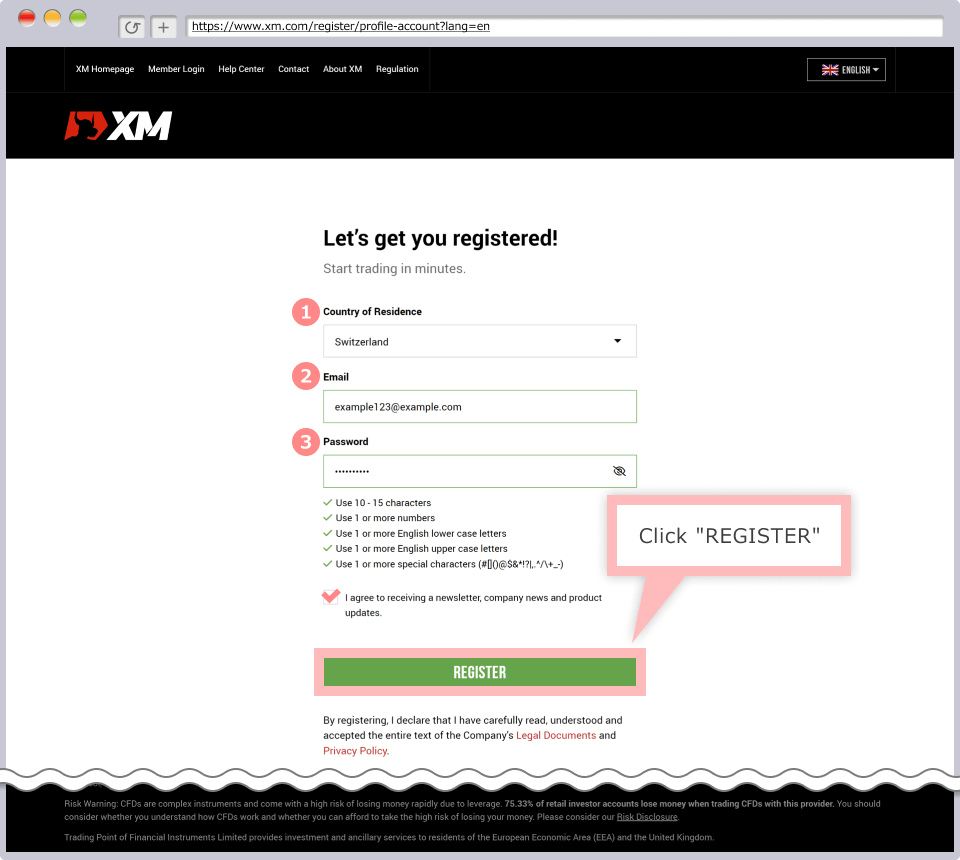
Once you click “Open a Real Account,” you will be taken to the registration form.
4. Step 3: Enter Personal Information

This is the first section of the registration form where you will provide your personal information:
- Full Name: Enter your full name as it appears on your ID or passport.
- Country of Residence: Select the country where you currently reside, as this will influence the account verification requirements and available deposit/withdrawal options.
- Language: Choose the language in which you want to receive communication from XM, such as English.
- Phone Number: Enter your mobile phone number to receive verification codes (OTP) for account security.
- Email Address: Use a frequently accessed email address to receive updates and notifications from XM.
- Trading Account Type: XM offers various account types, including Micro, Standard, Ultra Low, and Shares accounts. Choose the one that best suits your trading needs. Micro and Standard accounts are suitable for general trading, while the Ultra Low account offers lower trading fees.
5. Step 4: Select Account Details
In this step, you will choose some specific details about your trading account:
- Trading Platform: XM supports both MetaTrader 4 (MT4) and MetaTrader 5 (MT5), two of the most popular trading platforms globally. You can select the platform you are most comfortable with or wish to try.
- Account Type: As mentioned above, you can choose among different account types based on your trading needs.
Please note that if you choose MetaTrader 4, you can trade all instruments except stocks. MetaTrader 5 allows access to the stock market as well.
6. Step 5: Financial Information and Experience
At this stage, XM requires you to provide some information regarding your financial situation and trading experience. This information is necessary for compliance with international financial regulations, ensuring that you are aware of the risks involved in trading. You will provide details like:
- Income Source: Choose the primary source of your income, such as salary, investments, or business.
- Financial Status: Choose an economic status that best reflects your financial situation.
- Trading Experience: Let XM know about your trading experience, including whether you have traded CFDs, forex, or other complex financial instruments before.
This information is for XM’s records and does not affect your account’s approval.
7. Step 6: Set Password and Complete Registration
In the final step of the registration form, create a strong password for your account. This password will be used to log into your XM account on their online platform, so make sure it is complex enough but easy for you to remember.
Once everything is filled out, double-check your details to ensure accuracy. Then, click the “Open Real Account” button to submit your registration.
8. Verify Your Account
After registration, you’ll need to verify your account before you can start trading. XM will require you to upload certain documents to confirm your identity and residency:
- Identity Verification: Provide a scanned copy or photo of your ID card, passport, or driver’s license (must be valid).
- Address Verification: You need to provide proof of address, such as a recent utility bill or bank statement with your name and address, dated within the last three months.
Verification typically takes around 24 hours but may take longer if additional checks are required.
9. Deposit Funds into Your Account
Once your account has been verified, you can deposit funds to start trading. XM offers multiple deposit methods, including:
- Bank Transfer: Processing time is generally 2-5 days.
- Credit/Debit Card: Visa and MasterCard are accepted.
- E-Wallets: XM supports popular e-wallets like Skrill and Neteller.
Note that each deposit method may have different processing times and fees. Choose the method that works best for you.
10. Explore Trading Tools and Risk Management
Before you start trading on XM, take some time to familiarize yourself with the tools and risk management resources available. XM provides various educational materials, including:
- Video Tutorials: These help you understand how to use the trading platform.
- Webinars and Online Seminars: XM frequently hosts online classes with trading experts.
- Demo Account: You can use a demo account to practice trading without risking real money.
These resources will help you navigate the markets and trade more safely and confidently.
Creating an account on XM is straightforward if you follow the outlined steps. Once you have an account, take some time to explore the platform and practice with the demo account if you are new to trading. Managing risk and understanding the markets are essential keys to succeeding when trading on XM.


